| ||||||||||||||||||
| ||||||||||||||||||
Fred Bruenjes'MOONGLOW OBSERVATORY |
 |
NOTE: This page covers my old observatory, in operation from 1999 to 2007 and demolished in 2020. Please see this page for my current observatory.
Since I began taking CCD images in 1995, I have been bothered by how long it can take to set everything up. From when I decided to go out and take images to when I actually had my first image could be up to two hours. Add another hour to disassemble everything and you've already wasted three hours that could have been spent doing other things. This caused me to go out less and less until months passed between imaging sessions. I realized that if I was ever going to enjoy my hobby I would need to cut down on setup/takedown times. The only way to do that was to build an observatory...
I began looking at web pages and through dozens of old Sky & Telescope magazines, searching for the design that would suit me best. I needed something functional, inexpensive, easy to construct, and visually appealing. I finally stumbled onto a web page about Don Dillenger's roll-off roof observatory, which was almost exactly what I was looking for. I soon began drawing plans and making decisions.
PlanningFirst, it needed a name. I decided to call it "Moonglow Observatory" because I live on Moonglow Drive. I calculated that about 8 by 12 feet of floor space was the least I could possibly get by with. I wanted room for my telescope, a desk that could hold two computers, and a couch. Yes, a couch. My mother was going to get rid of it, but I told her that I would happily take it for use in the observatory. She agreed to hold on to it until I finished the observatory. |
|
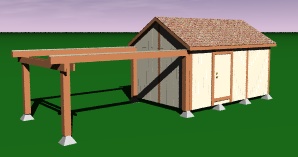
Thanks to the POV-Ray ray tracing software, I was able to create a realistic view of the building. This helped iron out all kinds of little details. Shown on the right is an overview of what I came up with, with realistic colors.
 |
The next step was to draw up plans, both for my use and for the local Environmental Control Committee, which regulates all aspects of landscaping and construction in our area. Shown at left are the plan views that were prepared for the proposal.
The observatory's main building is exactly 8 by 12 feet in exterior size. It is almost six feet from the ground to the top of the walls. From the floor to the top of the walls is four and a half feet. Four and a half feet was chosen because with about a three foot pier that would allow the telescope to see clear to the horizon in all directions except North. The pitch of the roof was chosen to accomodate a telescope slightly larger than the 8" Schmidt-Cass I am using now. |
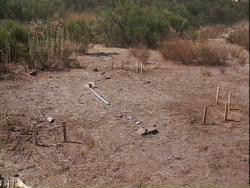
| Day 1 (August 25): The batterboards are going up! The extremely hard, rocky ground we have forced me to dig holes for the stakes and backfill them. I wasn't able to pound a single stake in more than two inches. |
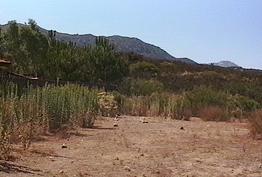
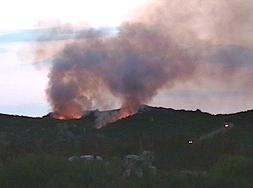
| Wildfire! (August 31): I was out digging one of the holes for the piers in the building when I saw a lightning bolt out of the corner of my eye and swung around to look at it. It took me by surprise as there were only some small clouds in the area, nothing big. When I turned back around to continue working I noticed a fire getting started less than a mile from me. |
|
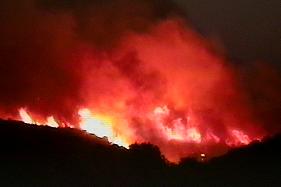
| The fire grew quickly, aided by the strong and variable winds that we had been experiencing. Soon thick black smoke began to fill the sky. I started getting a little nervous. As most anyone who has lived in Southern California can tell you, earthquakes are not our biggest worry. Fires are. This year, because of El Nino, we have tons of thick brush that is quickly drying in the hot sun (it got up to 113 here last week) and is the perfect fuel for a fire. |
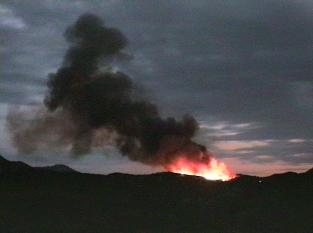
| Within an hour, the fire had grown greatly and was creeping towards my house (and the observatory). Fire crews had arrived but they were little match for the inferno that was going on. The flames shown here are almost 20 feet high! |
|
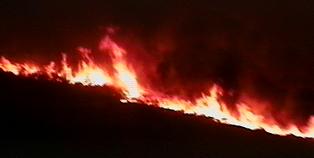
| Now I was getting scared. The flames were less than 1000 yards away and closing. There were at least three fire trucks parked near my house, complete with police and onlookers. When multiple fire trucks show up, you know you are in trouble. We decided it was time to pack. I took three days of clothes, my computer, and various sentimental items. |
Fortunately, the winds soon shifted, and a thunderstorm drifted into the area, dropping some light rain on the fire. The firefighters were also making headway with backfires and fire breaks. We were going to be okay. The fire engines left, so obviously they thought we were out of danger.
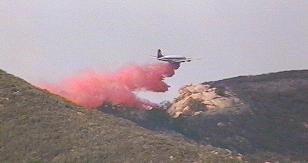
| The next day (September 1) the fire was still burning in places, though not with the severity of the previous night. This picture is of the CDF's fire bomber #14, laying down flame retardant on some hot spots. These planes are based out of our very own Ramona airport, so they are a common sight for us. Usually, however, they aren't dumping this close! |
|

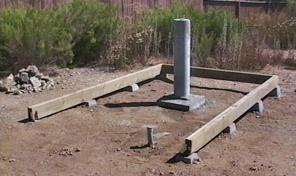
| September 6: All four corner piers are in place. The boards you see resting on them are the pressure-treated floor joists. I temporarily placed them on the piers to make sure everything was level. I still have four more piers to put in, as well as the massive telescope pier. |
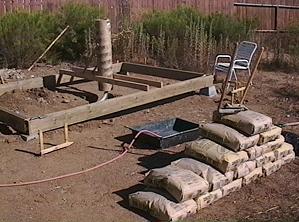
| September 10: I've built the form for the main telescope pier. Out of view is the 21"x21"x24" hole that will be filled with concrete to anchor the pier. We decided to mix our own concrete, rather than have it delivered, because of cost and timing issues. As you can see, everything is ready to go! |
|
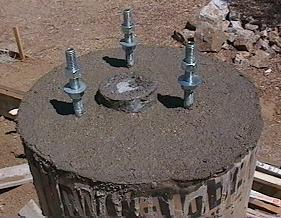
| September 11: We poured the concrete last night. It went well. We started a little past 5:30pm and finished at about 7:30pm. In all, we used 12 and a half 90lb bags of concrete, for a total of 1,125 pounds. Hand-mixing it wasn't really as hard as I thought it would be. This view is of the top of the pier, with the mounting bolts in place and the electrical conduit taped off. We had some problems with the tube, as the wet concrete caused it to melt in places. Mental Note: Never use the tubes as structural elements. |
| September 16: All of the concrete work is done! At the left side of the photo you can see my "rock collection." These are all of the rocks that came out of the nine holes I dug for the piers. Now do you understand why it took me two weeks to dig the holes?! |
|
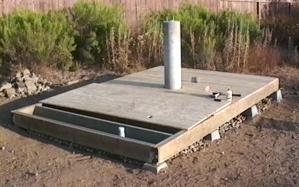
| September 20: The floor joists have been nailed down, and I am in the process of nailing down the plywood flooring. I am using 3/4" tongue and groove OSG subfloor. I am happy to report that the floor is very solid. Thank goodness! |
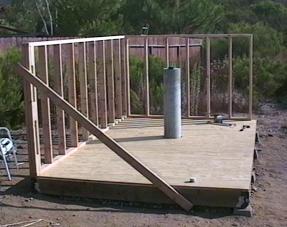
| September 23: Two of the walls have been framed. Compared to the previous steps, this went really fast. It only took me a day and a half to do the walls, working by myself. |
|

| October 7: Well, the framing for all four walls is finally done. I'm also installing some fine metal mesh to keep animals from getting underneath the building. Next step is to add the plywood siding. |
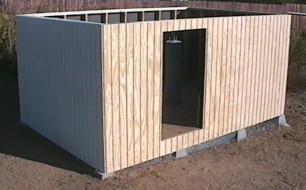
| October 17: It is actually starting to look like a building, now that the plywood siding has been put on. I am also starting to paint primer onto the building. Hopefully the rain will hold off until I can get a roof on; I am not too worried about this since I do live in San Diego! The total amount of money I have spent so far is about $800. |
|
| November 7: I haven't had much time to work on the observatory lately, and now I am into the fine detail work. As you can see, the door is now done and I have the doorknob and lock in place. I put a tarp over the building because it might rain the day after tomorrow. In the background is my neighbor's garage. |
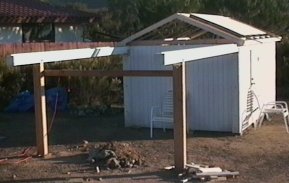
| December 27: Sorry for the break in updates. First I was too busy with other things, and now I am too busy finishing the building! As you can see, I have added the 6x6 inch, 12 foot long beams that support the roof when it is off. The roof itself has now been framed, and I am in the process of applying plywood. The roof is supported by twelve small casters, and rolls easily. I have also added four heavy duty latches to keep the roof on when it is closed. |
|
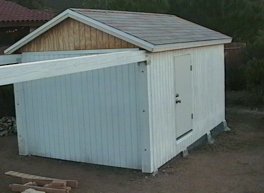
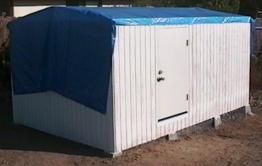
| January 2, 1999: The roof is essentially complete. I didn't realize asphalt shinges and plywood could be so heavy! It takes quite a lot of effort to move the roof, thank goodness it only has to be opened and closed once in a night. I would recommend to any potential observatory builders out there that you consider a lighter roof; either fiberglass, metal, or something else that is very lightweight. |
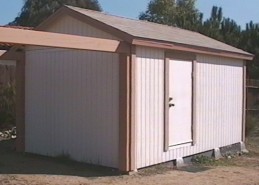
| February, 1999: The observatory is finally DONE! I am so relieved that it is complete. Total cost was in the $1500 to $1600 range, and I've made more trips to the Home Depot than I care to admit. It still has a few bugs to be worked out (door problems, heavy roof), but overall it came out exactly as I hoped it would. It has already proved to be very useful, and I have no regrets about building it. If you have been considering building your own observatory, I would say, "Go for it!" |
|
|
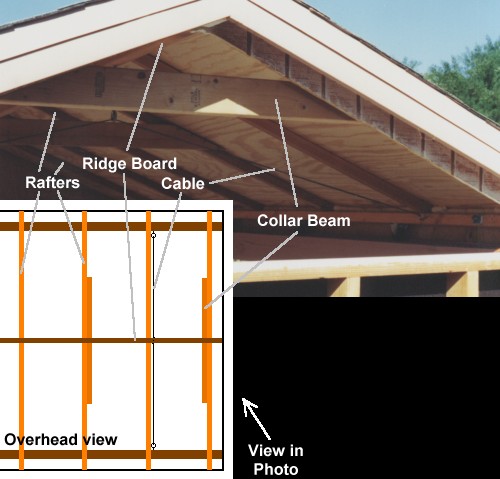
Unfortunately, the two collar beams were not enough to keep the roof from splaying out at the bottom on the south side, which is open so as not to hit the telescope. I had to add a cable to pull it back together. This cable carries a lot of weight and has snapped once already. It is under so much tension that the heavy duty eye bolts holding it are slowly uncurling. When I have time I will add another cable to distribute the tension some more.
If you are building an observatory, don't build your roof like mine! It's too heavy and you will have too many problems. Use corrugated metal or fiberglass or something similar - keep the weight down and keep the roof as rigid as possible. If you must build one in this style (I had to because of the local asthetic censor), don't compromise the strength by leaving out one of the sides, as I did. |
|
Click here to go back to my Observatory & Equipment page.
Or, you can go back to my main astronomy page.
Comments? Questions? Click here to send email to me, Fred Bruenjes.
All text and images are © 1995-2001 Manfred Bruenjes - All Rights Reserved. Image inlining is strictly prohibited. Email for permission before using an image or text.